How to integrate Figma webhooks

Introduction
You don't have to be an software expert to integrate and use Figma's webhooks. I've been a software engineer for the past 4 years and have had my fair share of working with webhooks. They are always notoriusly hard to get right... BUT in this blog I will show you how to get Figma's webhooks working in any of your projects.
Table of contents:
- Creating a Figma account
- Getting your personal access token
- Sending your first cURL or Node.js request to Figma
- Testing your webhooks
- Setting up in Syncd (optional)
Resources and links we will be using:
- Figma account
- Figma's REST API
- Syncd webhook registration service (optional)
You will need admin level access to your Figma account and a paid plan. The free tier doesn't allow for webhoook events to be registered.
1. Create a Figma account
Visit Figma's website at www.figma.com and register for free. NOTE: you will need a paid plan to be able to use Figma's webhooks (they don't allow free tiers to recieve webhook events). You can checkout all of their pricing plans here.
2. Getting your Personal Access Token
A personal access token gives the holder access to an account through the API as if they were the user who generated the token. Generate a personal access token
Option 1: Get token from the your account settings
Login to your Figma account
Head to Settings from the top-left menu inside Figma.
Find the Personal access tokens section
Click Generate new token to open the configuration modal.
Set the expiration and scopes for the token
The scopes will determine which endpoints the token has access to.
Click Generate token
This will be your only chance to copy the token, so make sure you keep a copy of this in a secure place.
Option 2: Use Figmas built in GUI
Just click the "+ Get personal access token" button on the right side of the page. See image below for details.

Option 3: Use Syncd.dev
This is by far the easiest option, and the one we 100% recommend. All you have to do is click one button and your done. Here's how you do it with Syncd:
Step 1: Connect your Figma account - that's it!
3. Register a webhook
There are a couple of options when registering webhooks with Figma. Lets take a look at some of them below. You can choose the one that best fits your needs.
Send a cURL request
This is the most bare bones option, and will be harder to maintain.
Use their built in graphical user interface
Figma has a GUI built into their API docs. This allows you to easily interact with their API without sending requests of your own.
Use Syncd
Syncd allows you to register, monitor, send, and debug Figma webhooks with one click. This is the option we recommend, but any work!
Option 1: cURL request
You can get your personal access token from the steps above. It is the one we saved in your notepad. You can also use a cURL request to get it.
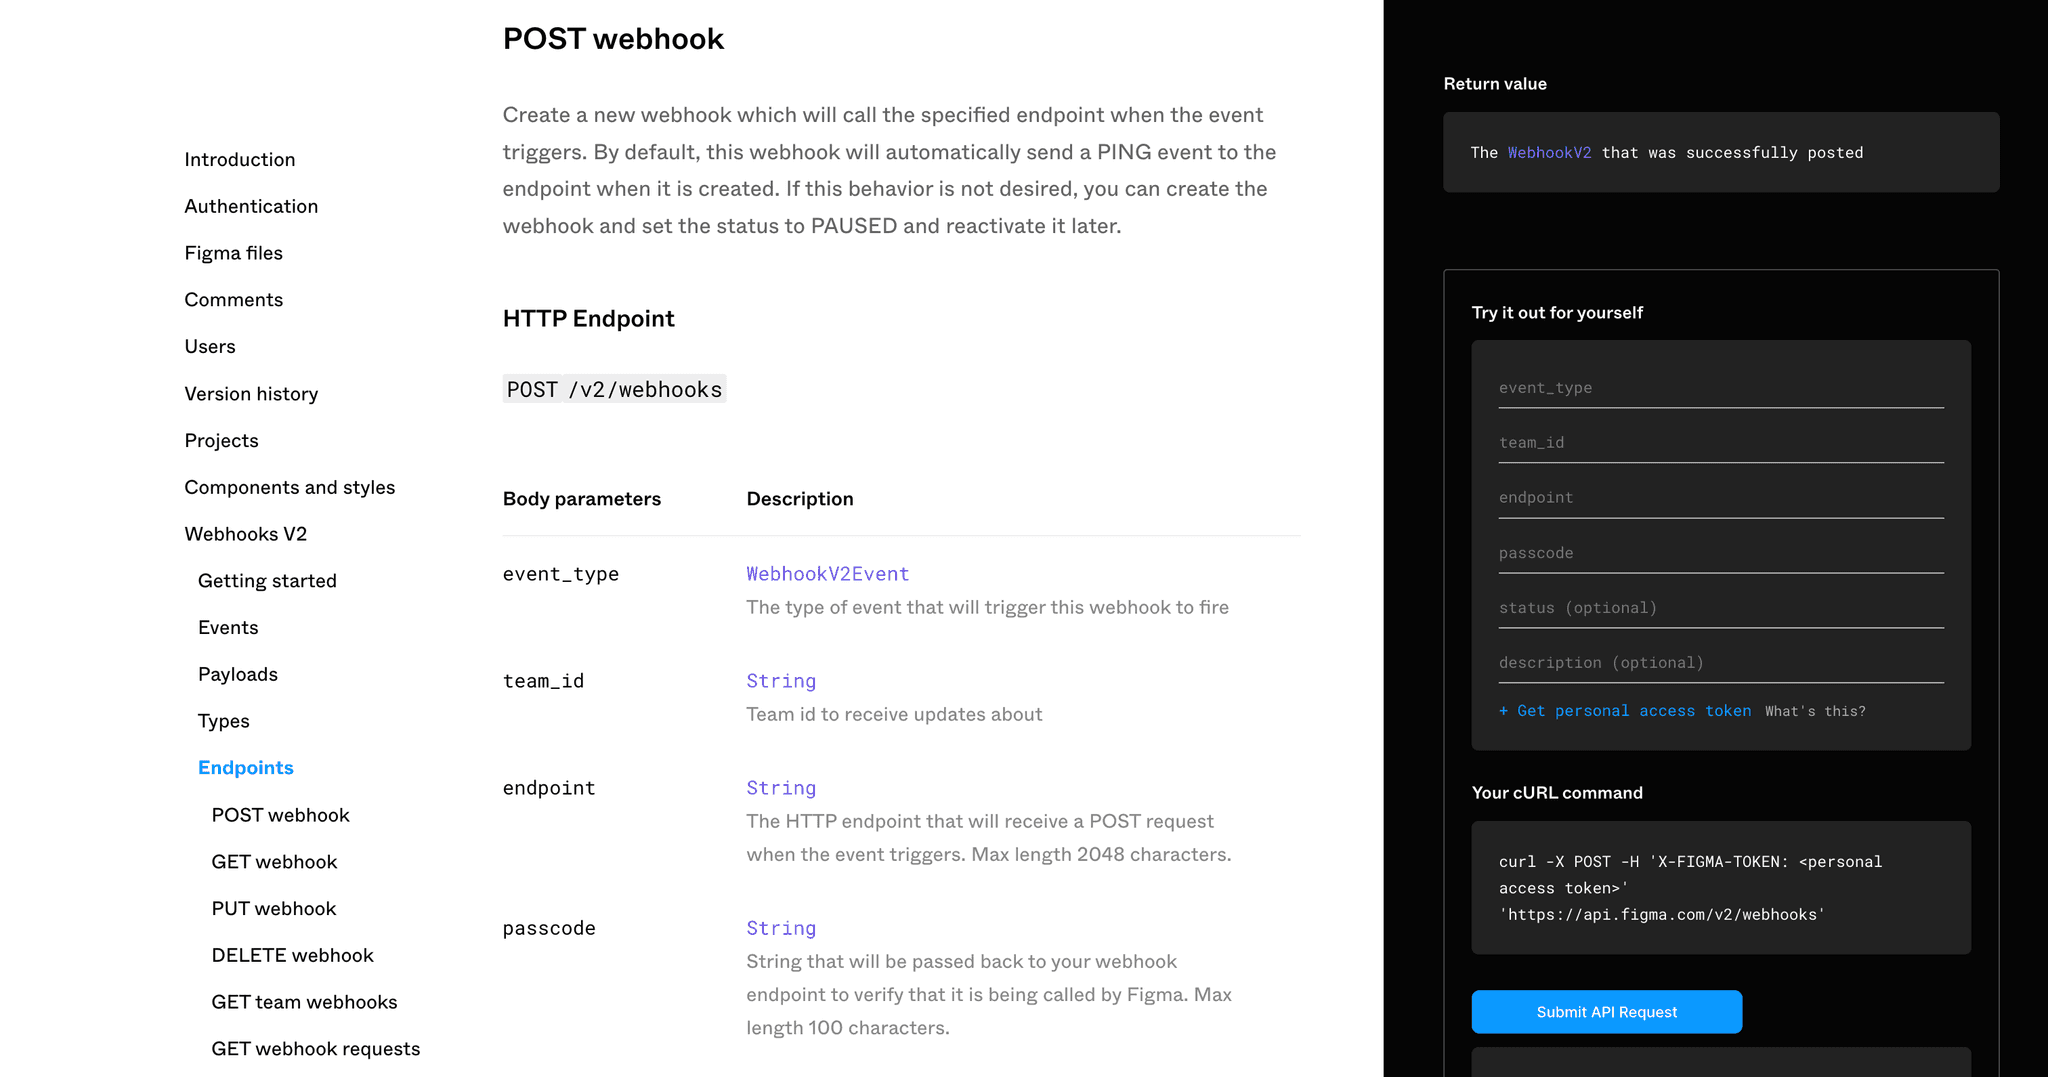
curl -X POST -H 'X-FIGMA-TOKEN: <personal access token>' 'https://api.figma.com/v2/webhooks'Option 2: Use built in GUI
This option is very easy and straight forward. You will just click the "Submit API Request Button" after you fill out all the information in the form. See the image below for the location you should be at.
Option 3: Use Syncd.dev
This is by far the easiest option, and the one we 100% recommend. All you have to do is click one button and your done. Here's how you do it with Syncd:
- Navigate to the Syncd.dev website and log in to your account.
- If you haven't already, connect your Figma account to Syncd.dev.
- Create a project if you haven't already. If you have, navigate to the project you want to add the webhook to.

- Click the "+ new webhook" button.
- Choose Figma from the dropdown.

- Fill out the form with the information you want to use.

That's it! You're done. You can now monitor, send, and debug your Figma webhooks from the Syncd.dev dashboard.
Step 3: Testing the Integration
To ensure that your integration is working correctly we need to test it. There are a couple of options for this as well. You can choose the one that best fits your needs.
Option 1: Look at your API logs
Login to your API provider or wherever you registered your webhook
Navigate to the logs section of the dashboard.
Look for the most recent logs
You should see a log for the webhook you just registered.
Check the status code
If the status code is 200, then the webhook was registered successfully.
Option 2: Use Figmas built in GUI
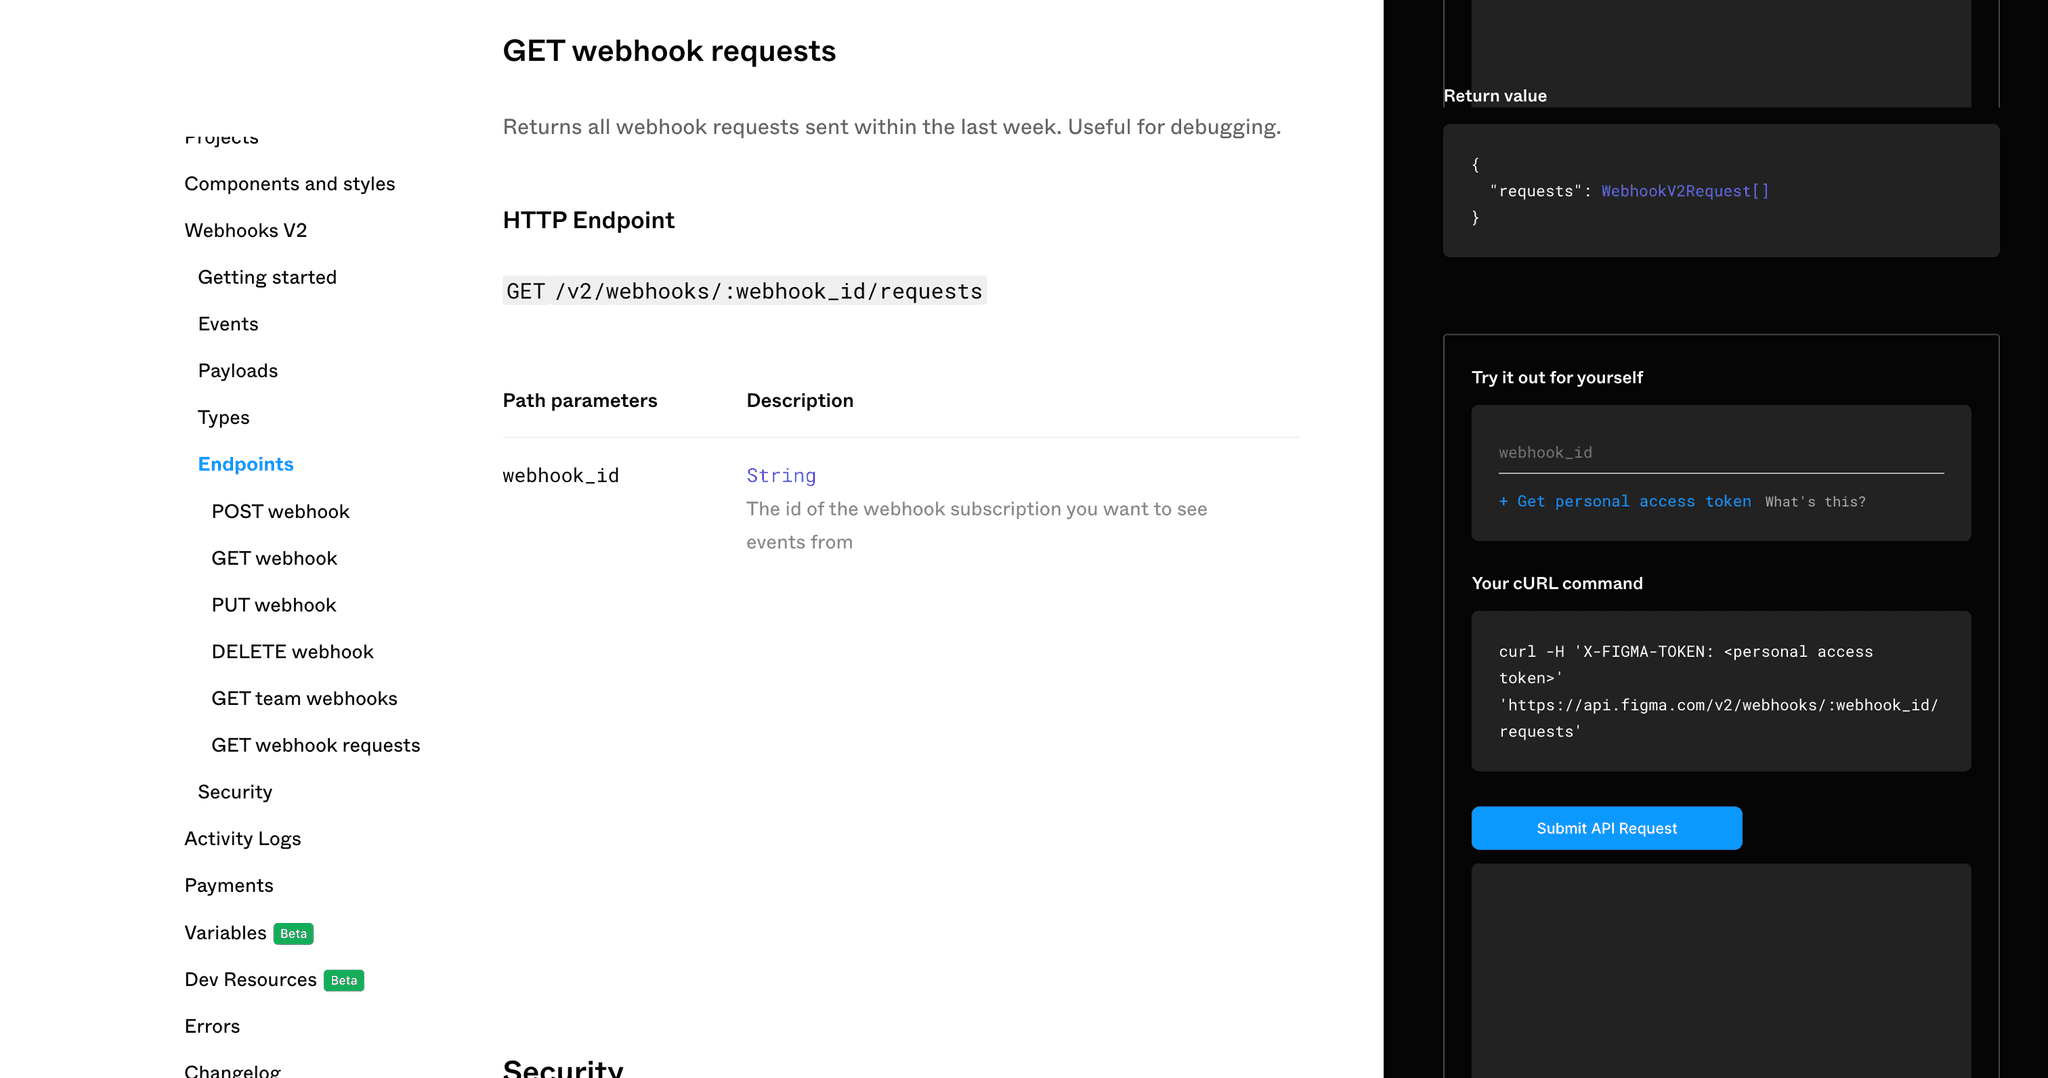
Navigate here and click the "Submit API Request" button. You should see a response in the bottom right of the page. If it is a 200 status code, then the webhook was registered successfully.
Option 3: Use Syncd.dev
Once again this is the easiest option. All you have to do is navigate to the dashboard and look at the logs. You should see a log for the webhook you just registered. If the status code is 200, then the webhook was registered successfully. See below an example of what the logs look like (this is a screenshot of the Syncd.dev dashboard). It returns the raw payload data.

4. Benefits of Using Syncd.dev with Figma.com's Webhooks over other Methods
Integrating Figma.com's webhooks through Syncd.dev offers several advantages:
- Debug and Monitor: Syncd.dev provides a centralized platform for debugging and monitoring your Figma webhooks, allowing you to track and analyze their performance.
- Rate Limiting: Syncd.dev helps you manage rate limits and avoid overloading your Figma account with excessive webhook requests.
- Real-Time Updates: You receive instant updates whenever changes occur in your Figma projects, ensuring transparency across your team.
- Enhanced Collaboration: Syncd.dev allows you to trigger actions for your team members, such as notifications or automated tasks, keeping everyone on the same page.
- Streamlined Workflow: By integrating Figma.com's webhooks through Syncd.dev, you can seamlessly connect your design process with other tools and services.
5. Conclusion
With Syncd.dev and Figma.com's webhooks, you can supercharge your design workflow and automate routine tasks effortlessly. By following the steps outlined in this blog post, you'll be able to integrate Figma.com's webhooks seamlessly into Syncd.dev, enabling you to stay connected and productive. Give it a try and experience the power of automation in your design process!
To learn more about Syncd.dev and its integration capabilities, visit our website at www.syncd.dev.